So, you're dreaming of that exotic getaway, that crucial business trip, or that long-awaited family reunion abroad. You've booked your flights, packed your bags, and are practically buzzing with anticipation. But wait! Have you checked your passport lately? And more importantly, is your passport photo up to snuff?
Getting a passport photo rejected can feel like a punch in the gut. It's a frustrating setback that can derail your travel plans and leave you scrambling for a last-minute solution. But don't despair! This guide is here to help you navigate the often-bizarre world of passport photo requirements, offering a mix of humorous anecdotes, practical advice, and cutting-edge AI solutions to ensure your photo sails through the approval process. To better understand some common mistakes, watch this video: 10 Passport Photo Mistakes
Hilarious Passport Photo Fails: Stories from the Front Lines
The world of passport photos is ripe with opportunities for things to go hilariously wrong. Here are some real-life examples of passport photo fails that will make you laugh (and maybe cringe a little):
- Grandparent Glitches: Picture this: it's 2015, and unsuspecting grandparents everywhere are falling victim to the siren song of the "fun" options at photo booths. Instead of a dignified portrait, their passport applications are adorned with cartoon wigs, comical frames, or even an accidental Ali G impersonation.
- The Case of the Sleepy Baby: A 2012 photo featuring a five-month-old looking utterly "worse for wear" became an internet sensation. The baby's droopy-eyed expression, a far cry from the required neutral gaze, was quickly photoshopped into countless memes.
- Printing Perils: Sometimes, it's not your fault at all! One woman's passport photo was distorted during the printing process, resulting in a forehead that appeared to stretch to infinity and beyond. Talk about a headshot gone wrong!
- Software Struggles: In the age of online applications, even technology can be discriminatory. One applicant was met with an error message suggesting the software simply couldn't recognize his Asian features. A truly modern passport problem!
- Identity Theft, Photo-Style: Can you imagine receiving a passport with someone else's picture? One woman experienced this bizarre identity swap firsthand, proving that mix-ups can happen even in the most official of settings.
- Wardrobe Woes: The clothing choices can often contribute to funny passport photo fails. A child's shirt that was partially cut off in a photo, resulting in the visible part of the shirt spelling out "fat."
- Hitler Shadow: A man's passport photo appeared to have a shadow resembling Hitler's mustache.
- Mismatched Background: A woman wore a hijab that was a similar color to the background, creating a "floating head" effect.
The High Cost of a Bad Passport Photo
While these stories are undoubtedly amusing, a rejected passport photo is no laughing matter. The consequences can be significant:
- Delayed Travel Plans: The most obvious consequence is a delay in your travel plans. If your passport application is rejected due to a faulty photo, you'll need to resubmit, adding weeks to the processing time. For information on how long it takes to obtain a passport, check out our article.
- Missed Opportunities: Whether it's a crucial business meeting or a long-awaited vacation, a delayed passport can mean missed opportunities and significant financial losses.
- Increased Stress: Dealing with government bureaucracy is stressful enough. Adding a rejected passport photo to the mix can send your anxiety levels through the roof.
- Additional Expenses: Resubmitting your application may require you to pay additional fees for a new photo or expedited processing. Don't forget to check the U.S. passport fees before you apply.
Common Reasons for Passport Photo Rejection
So, what exactly are the common pitfalls that lead to passport photo rejection? Here's a breakdown of the usual suspects. For more details, see our article on top reasons your ID photo could be rejected:
- Incorrect Size and Dimensions: Photos must adhere to strict size requirements (e.g., 2x2 inches in the US). Head size must also fall within specific measurements. Be sure to understand the passport photo size in the U.S.
- Poor Lighting: Harsh shadows, overexposure, underexposure, glare on glasses, or red-eye are all grounds for rejection. Ensure even lighting on both sides of your face.
- Background Issues: Only a plain white or off-white background is acceptable. No shadows, patterns, or objects are allowed. See our tips on choosing the perfect passport photo paper.
- Inappropriate Facial Expression: A neutral expression is key. No smiling, frowning, or showing teeth. Eyes must be open and looking directly at the camera. Is it okay to smile in a passport photo? Find out here.
- Bad Photo Quality: The photo must be clear, sharp, and free of tears, holes, smudges, pixelation, or blurriness.
- Incorrect File Format (for Digital Submissions): Digital photos must be in JPEG format with the correct color profile (sRGB).
- Excessive Accessories or Unacceptable Attire: Hats, headbands, or other accessories that obstruct the face are generally prohibited. Religious head coverings are often permitted, but they must not obscure your facial features. What should you wear for a US passport photo?
- Head Tilt: Your head must be straight and level.
- Eyeglasses: As a general rule, eyeglasses are no longer permitted in U.S. passport photos. For guidance on how to handle this requirement, see the U.S. Department of State website.
DIY Passport Photos: A Step-by-Step Guide
Want to save money and take your passport photo at home? Here's a step-by-step guide to help you get it right. You can also follow the tips in this video: Taking A Passport Photo At Home
- Gather Your Supplies: You'll need a digital camera or smartphone, a plain white or off-white background (a wall or sheet will do), and good lighting. Consider printing your photo at Walmart or Walgreens.
- Find a Well-Lit Spot: Natural light is best. Position yourself facing a window, but avoid direct sunlight, which can create harsh shadows.
- Set Up Your Background: Make sure your background is smooth, clean, and free of any distractions.
- Dress Appropriately: Wear plain, everyday clothing. Avoid white shirts (as they blend into the background) and anything too flashy or revealing. Remove eyeglasses, hats, and other accessories (unless worn for religious or medical reasons). What to wear for a US passport photo matters!
- Strike a Pose: Stand or sit facing the camera directly. Keep your head level and your shoulders relaxed. Maintain a neutral expression with your mouth closed.
- Take Several Shots: Take multiple photos to ensure you have a few good options to choose from.
- Review Your Photos: Carefully review your photos and select the one that best meets the official requirements. Pay close attention to lighting, background, facial expression, and overall image quality.
- Crop and Resize Your Photo: Use an online tool or photo editing software to crop and resize your photo to the correct dimensions (2x2 inches in the US). There are also free background remover tools available online if necessary.
Expert Tips for DIY Success
- Enlist a Friend: Having someone take your photo for you can help ensure proper framing and focus.
- Use a Tripod: A tripod can help stabilize your camera and prevent blurry photos.
- Check Official Government Websites: Regulations can change, so check the official government websites for your country before taking your photos. See the U.S. Department of State guidelines.
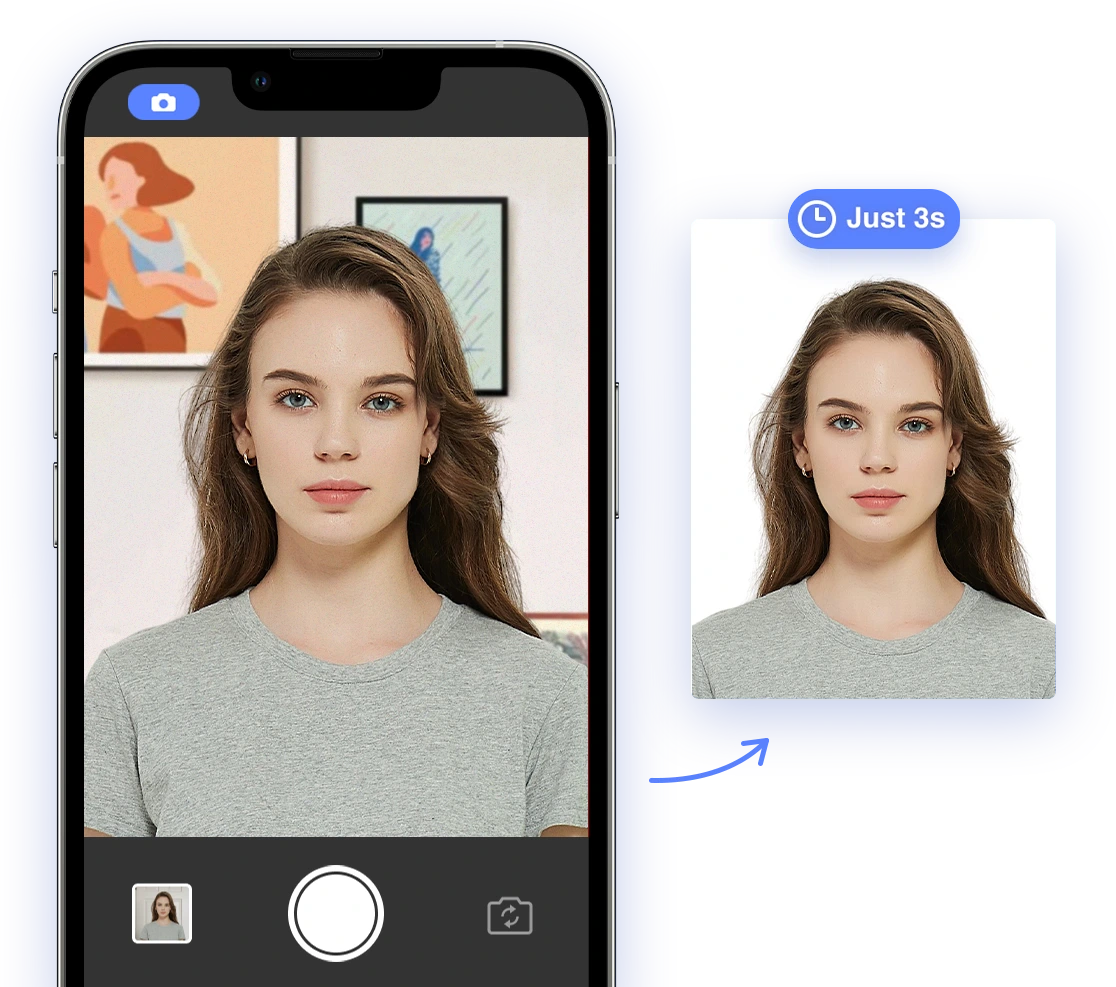
AI to the Rescue: Ensuring Compliance with AI Passport Photo
While DIY passport photos can save you money, they also come with a higher risk of rejection. That's where AI-powered passport photo tools like AI Passport Photo come in. If you want to see how AI tools can help, check this out Make Passport Photo in 1 Minute!
How AI Simplifies the Process
AI-powered tools use sophisticated algorithms to automatically analyze your photo and ensure it meets all official requirements. They can:
- Automatically crop and resize your photo to the correct dimensions.
- Remove and adjust the background to ensure it's a plain white or off-white.
- Check for proper lighting, facial expression, and head position.
- Detect and flag any potential issues that could lead to rejection.
Recommended AI Passport Photo Tools
- PhotoAiD: This app crops, resizes, and removes backgrounds. It also has an expert review to ensure compliance. *CTA: Try PhotoAiD and get your passport photo done right!*
- AI Passport - Visa & ID Photos: This app generates biometric passport photo templates and can resize photos to the required dimensions. *CTA: Use AI Passport - Visa & ID Photos today and ensure compliance.*
- Picsman AI Passport Photo Maker: This tool uses face detection to automatically locate and crop your face according to guidelines. It also allows you to customize the background color. *CTA: Make perfect pictures in minutes with Picsman AI Passport Photo Maker!*
- Passportmaker AI: This tool edits your image to comply with document-specific sizes and allows you to change outfits and correct lighting. *CTA: Let Passportmaker AI handle the editing to guarantee your acceptance.*
Why Choose AI?
Some of the benefits include:
- Guaranteed Compliance: AI tools are constantly updated to reflect the latest passport photo regulations, minimizing the risk of rejection.
- Convenience: Take your photo from anywhere, at any time, using your smartphone or computer.
- Cost-Effectiveness: AI passport photo tools are often more affordable than professional photo services. Printing your photos at a local store such as Walgreens is also an affordable option, see "How to Print Your Passport Photo at Walgreens for 38 Cents (2022)"
- Time Savings: Get your passport photo ready in minutes, without having to visit a photo studio or wait in line.
Troubleshooting Common Passport Photo Problems
Even with the best DIY efforts and AI assistance, you might still encounter some common passport photo problems. Here's how to troubleshoot them:
- Photo is Too Dark or Too Light: Adjust the lighting in your environment or use a photo editing tool to brighten or darken the image slightly. Be careful not to overdo it, as this can distort your features.
- Background is Not White Enough: Use a background removal tool to replace the existing background with a pure white one.
- Face is Not Centered: Use a cropping tool to center your face within the frame.
- Photo is Blurry: Ensure your camera is focused and your hands are steady when taking the photo. A tripod can help.
What to Do If Your Photo is Rejected
Despite your best efforts, your passport photo might still get rejected. If this happens, don't panic! Here's what to do:
- Review the Rejection Notice: Carefully read the rejection notice to understand the specific reason for the rejection.
- Correct the Issue: Address the problem identified in the rejection notice. This might involve taking a new photo, adjusting the lighting, or cropping the image differently. You might also find this article helpful: "What if my passport photo is rejected?"
- Resubmit Your Application: Resubmit your application with the corrected photo. Be sure to follow all instructions carefully.
Conclusion
Obtaining a compliant passport photo can seem like a daunting task, but it doesn't have to be. By understanding the requirements, following our DIY tips, and leveraging the power of AI, you can ensure your photo is accepted and your travel plans remain on track. So, go ahead, snap that perfect shot and get ready to explore the world!
Ready to take the stress out of your passport photo? Try our AI Passport Photo tool today and get guaranteed compliance!